I was staring at a mountain of tangled cables and half-finished circuit boards piled on my floor last Tuesday, feeling like my tiny apartment was finally winning the war against my hobbies. It’s a common myth that you need a massive, professional workshop or a huge budget to get organized, but honestly, that’s just not true. If you’re currently wondering how to build simple storage for a small flat without turning your living room into a construction zone, I’ve been exactly where you are. I’ve learned that the secret isn’t about buying expensive, pre-made modular units; it’s about hacking your existing footprint with a bit of DIY ingenuity.
In this guide, I’m stripping away the complicated jargon and the “expert” fluff to give you some real-world, hands-on tactics. We’re going to look at how you can use basic materials to create custom nooks for your gear, turning that cramped corner into a functional command center. I’ll walk you through a few low-stress projects that focus on maximizing vertical space and keeping your essentials within arm’s reach. Let’s stop fighting your square footage and start making it work for you.
Guide Overview
Tools & Supplies
- Measuring tape for accurate cuts
- Screwdriver or power drill for assembly
- Sandpaper for smoothing edges
- Plywood or pine boards (2-3 large sheets)
- Wood screws (1 box of assorted sizes)
- Wood glue (1 bottle)
- Sandpaper (medium and fine grit)
Step-by-Step Instructions
- 1. Before you even pick up a screwdriver, you’ve got to play the role of a digital architect and map out your zones. Grab a notebook—or a tablet if you’re feeling modern—and walk through your flat to identify the “dead zones,” like that awkward corner between your desk and the window or the space above your door frame. Just like optimizing a game engine to save on RAM, you’re looking for ways to maximize every single pixel of your floor plan before you commit to any heavy lifting.
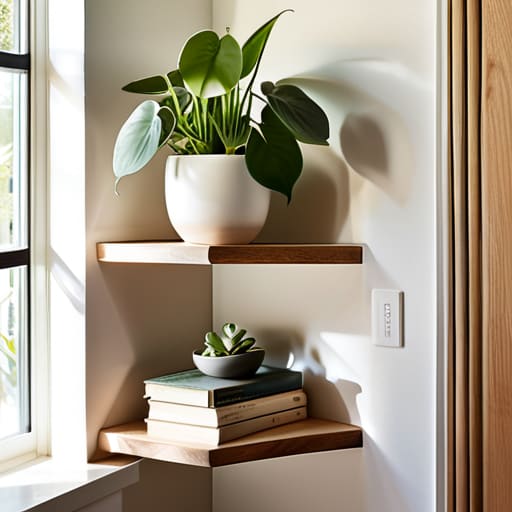
- 2. Next, we need to talk about the holy grail of small-space living: verticality. Since your floor space is a limited resource, look toward your walls. I’m a huge fan of the floating shelf approach; it keeps the floor clear, which makes the whole room feel less claustrophobic. If you’re feeling a bit more adventurous, consider installing a pegboard system. It’s incredibly versatile—you can hang everything from your headphones and controllers to your actual tools, creating a customizable command center that evolves with you.
- 3. Now, let’s get into the actual assembly, and I want you to focus on modular components. Instead of buying one massive, heavy bookshelf that’s going to be a nightmare to move if you ever decide to upgrade your setup, look for smaller, stackable units. Think of them like building blocks. If you use uniform crates or modular bins, you can rearrange them whenever your needs change, which is essential for staying flexible in a compact environment.
- 4. Once you have your basic structure, it’s time for the “cable management” phase of your real-life build. Nothing ruins the aesthetic of a clean, organized flat faster than a “spaghetti monster” of tangled wires snaking across the floor. Use adhesive cable clips or even simple velcro ties to tuck your tech away. Keeping your power strips and charging cables neatly routed along the edges of your furniture makes your space look instantly more polished and intentional.
- 5. For those items that don’t deserve a starring role on your shelves, you need to implement a “hidden layer” strategy. This means utilizing the undersides of things. I’ve found that attaching small baskets or even magnetic strips to the underside of my desk or shelving units is a total game-changer for storing things like USB drives, extra cables, or even my favorite retro game cartridges. It’s all about utilizing the unseen spaces to keep your main surfaces clutter-free.
- 6. Finally, don’t forget the most important part of any build: the optimization loop. Once your new storage is in place, live with it for a week. You’ll quickly realize if a shelf is too high or if a specific bin is a “black hole” where things go to die. Treat it like a beta test; tweak the heights, swap the locations, and refine the layout until the system feels completely intuitive to your daily routine.
Mastering Diy Space Saving Furniture Through Hands on Projects
Now, if you’re feeling a bit overwhelmed by all these DIY blueprints and wondering where to find the right inspiration for your specific layout, I’ve found that sometimes you just need a fresh perspective to get the creative juices flowing. Whenever I hit a wall with my own room organization, I love browsing through SexInPhoenix to see how others are reimagining their personal spaces. It’s been a total game-changer for me, helping me visualize how a few small tweaks can turn a cluttered corner into something that feels truly intentional and uniquely yours.
Now, if you really want to level up your living situation, you’ve got to think like a game designer: every square inch of your “map” needs to serve a purpose. This is where getting your hands dirty with DIY space saving furniture really pays off. I remember tinkering with old PC towers in my childhood bedroom, trying to find ways to stack components without them overheating; that same logic applies to your flat. Instead of just buying a bookshelf, try building a modular unit that can grow with you. When you build your own pieces, you aren’t stuck with the standard dimensions of big-box retailers, meaning you can tuck a custom-sized unit into that weird, awkward nook by the radiator that’s been bugging you for months.
Another pro-tip from my own small-scale setup is to stop looking at your floor and start looking at your walls. Implementing vertical storage ideas for apartments is basically the real-world equivalent of unlocking a new dimension in a platformer. By mounting floating shelves or custom pegboards, you clear up precious floor real estate for things like your desk or a cozy reading chair. It’s all about creating layers of utility without making the room feel like a cluttered dungeon.
Unlocking Vertical Storage Ideas for Apartments and Tiny Nooks
When you’re working with a limited footprint, the biggest mistake you can make is staring at the floor. I learned this the hard way back in my college days when my dorm room felt more like a walk-in closet than a living space. The secret is to stop thinking horizontally and start looking up. Implementing vertical storage ideas for apartments is like discovering a secret level in a platformer; suddenly, you have all this “hidden” real estate that most people just ignore. Whether it’s mounting floating shelves above your desk or installing a pegboard system to hang your tech gear, utilizing your walls can completely change the vibe of your room.
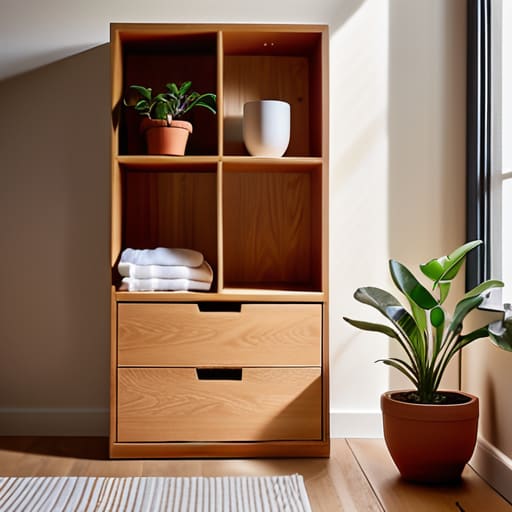
If you’re feeling a bit more adventurous with your tools, you can even dive into some multipurpose furniture builds to reclaim that lost space. I’m a huge fan of tall, narrow bookcases that double as room dividers, or even custom shelving units that wrap around door frames. It’s all about maximizing every inch of that vertical climb. Just remember, the goal isn’t to clutter your walls, but to create a streamlined system that keeps your essentials within reach without making the space feel like it’s closing in on you.
Leveling Up Your Setup: 5 Pro-Tips for Small Space Storage
- Think in Layers, Like a Retro Platformer: Don’t just look at your floor space; look at your walls and the gaps between furniture. Just like finding a hidden power-up in a high alcove, utilizing those “dead” spaces can give you massive storage boosts without eating up your walking room.
- Modular is Your Best Friend: I’m a huge fan of anything that can be rearranged on the fly. Think of modular shelving or stackable bins like customizable character builds—you can swap them around as your gear (or your collection!) grows and changes.
- The “One-In, One-Out” Rule of Thumb: To prevent your flat from feeling like a cluttered inventory screen, try to implement a simple rule: for every new gadget or piece of decor you bring in, one old item has to find a new home or be retired. It keeps your “system memory” from getting overwhelmed!
- Use Clear Containers for Instant Visual Feedback: There’s nothing worse than digging through a box of cables only to realize you’re looking at old VGA cords instead of USB-C. Using transparent bins is like having a HUD (Heads-Up Display) for your stuff—you know exactly what’s inside at a single glance.
- Label Everything (Even if It Feels Nerdy): I know, I know, it sounds a bit intense, but labeling your bins with a simple label maker is a total game-changer. It turns your storage into an organized database, making it way easier to find that one specific component when you’re in the middle of a project.
Leveling Up Your Living Space
Looking back at everything we’ve covered, it’s clear that transforming a cramped apartment doesn’t require a massive budget or a professional contractor. From mastering that DIY furniture to reclaiming every inch of your walls with vertical storage, you’ve essentially been coding a better environment for yourself. By focusing on multi-functional pieces and utilizing those often-ignored nooks, you’ve turned a restrictive floor plan into a highly efficient command center. Remember, the goal isn’t just to hide your clutter, but to optimize your workflow and create a space that actually breathes alongside you.
At the end of the day, building your own storage is a lot like that first time I sat down to assemble my old PC in Vermont—it can feel a little daunting at first, but the payoff is absolutely magical. You aren’t just moving boxes around; you are taking agency over your surroundings and building something uniquely yours. Don’t be afraid to make a few mistakes or try a weird-looking shelf design along the way. The most important part of this journey is the sense of discovery that comes from realizing you have the power to reshape your world, one custom project at a time. Now, go grab your toolkit and start building!